You may have seen my previous post regarding the use of the Pressman Model D from a few years ago. As I was further building out this website it occurred to me that some of you might find my restoration of that camera useful – or at least somewhat entertaining. When I began this project I really had no idea what I was doing. At the end of the project I was only slightly more educated. But at least I felt like I accomplished something. And isn’t that all we really want? Well, whatever your feelings on the matter, check out the gallery below to see what I did to return the junker to its (mostly) original glory.

The finished product 
Condition in which I bought it 
Rust and corrosion 
More rust and corrosion 
Grimy 
Disassembly was relatively easy. No stripped or seized screws. Ziploc bags are great for keeping track of the components. 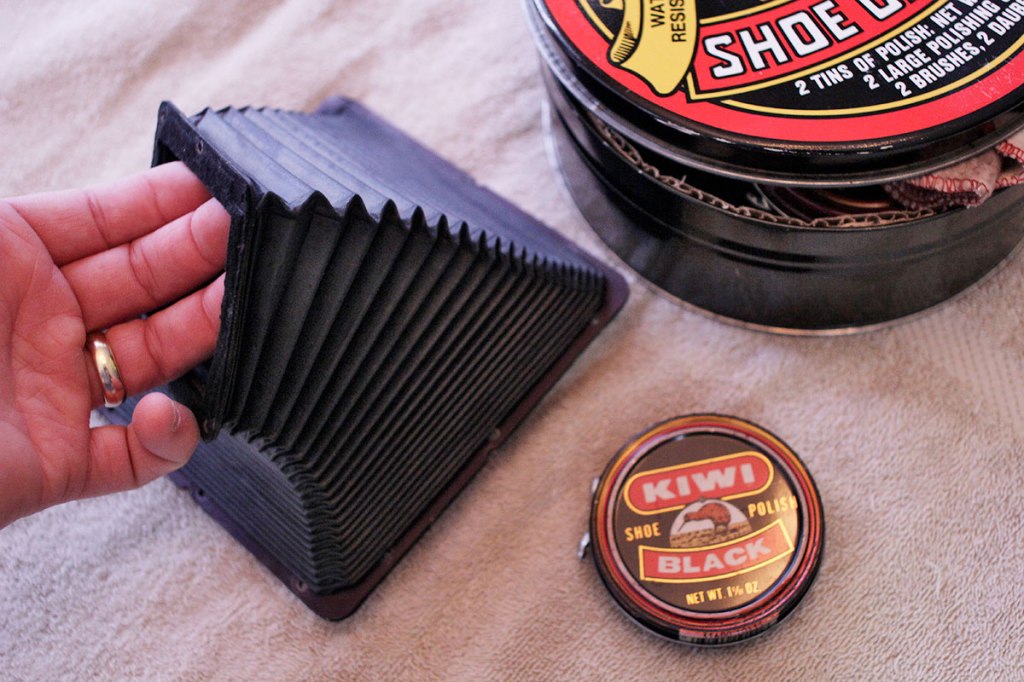
The bellows were dirty, but in good shape. I couldn’t detect any light-leaks. So, a little soapy water and a toothbrush, dry, then get it looking new with some classic Kiwi black. 
This is basically the body “shell” of the camera. No lens. No bellows. No back to hold the film. This is all aluminum-as opposed to wood on the old Graflex bodies. 
Manufacturing badge and serial #. Made in Chicago! 
Here I have the focusing rails removed and ready to clean. The grease they used on the moving parts has turned into glue. A good soak in Goo-Gone will get rid of that. 
Tiny springs under the focusing rails to keep tension on the focusing mechanism. They’re corroded. Another thing to soak in Goo-Gone. 
Most of the grease is gone. I’m impressed with the quality of the machining of these parts. This is one of the focusing knobs and it’s lock-ring. 
Solid aluminum front standard. The shift is by worm gear. The rise and tilt are adjusted by hand, then locked. The tolerances on this are very tight – easy to move with no play. 
Here you can see the worm gear that drives the shift movement. 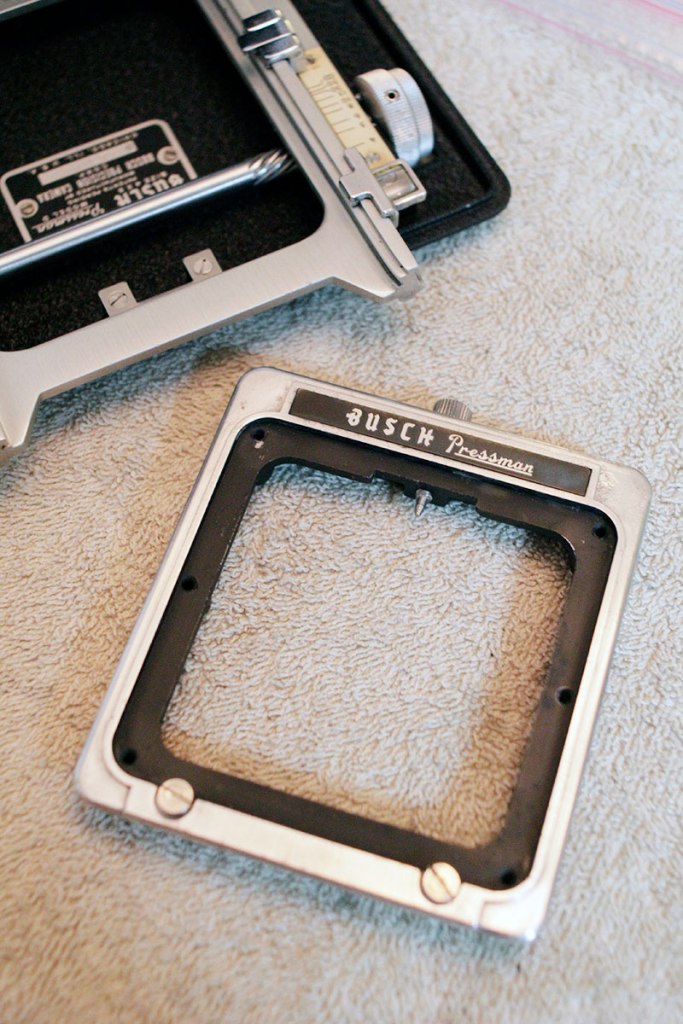
My biggest beef with the camera is the small lensboard opening. It absolutely limits your options of lenses. 
I used white lithium grease to lubricate the geared focusing and shift movements. If I were to do this again, I might go with real helicoid grease. 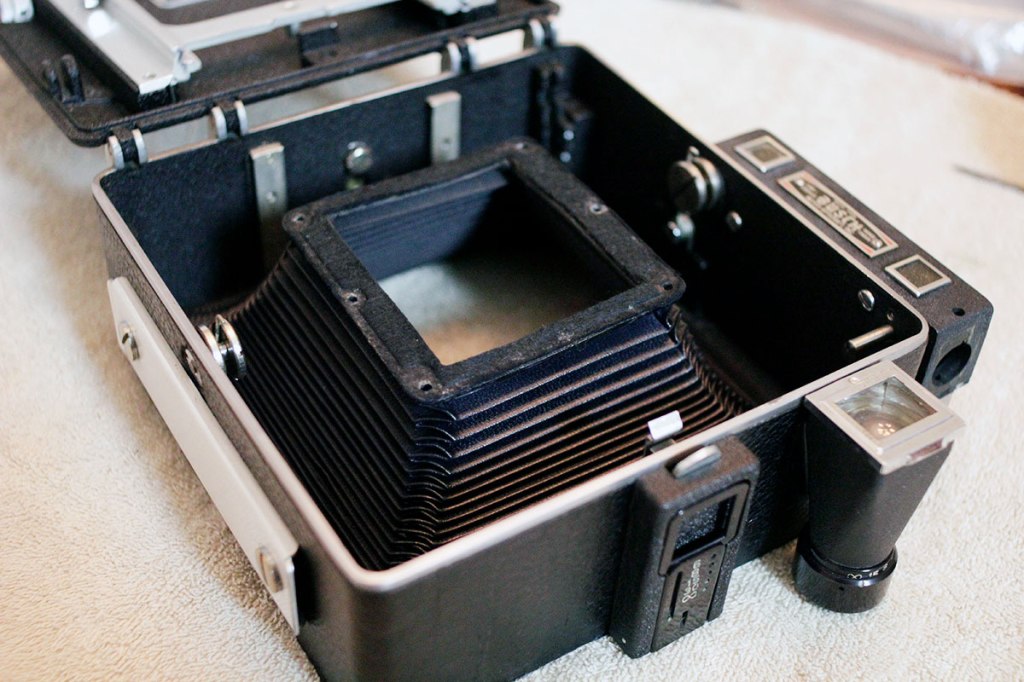
Reinstalled the bellows. It was attached with screws that are easy to get to. 
Hinges for the drop bed were removed, cleaned and reinstalled. 
Here’s the back. The design of the Pressman allows you to rotate the back to either horizontal or vertical position WITHOUT having to remove the camera from the tripod and re-attach like a Graflex. 
The rear film holder. 
And the components after disassembly. I’ve had my kids save those little plastic containers out of gum machines. They’re perfect for holding and soaking tiny parts in cleaner. 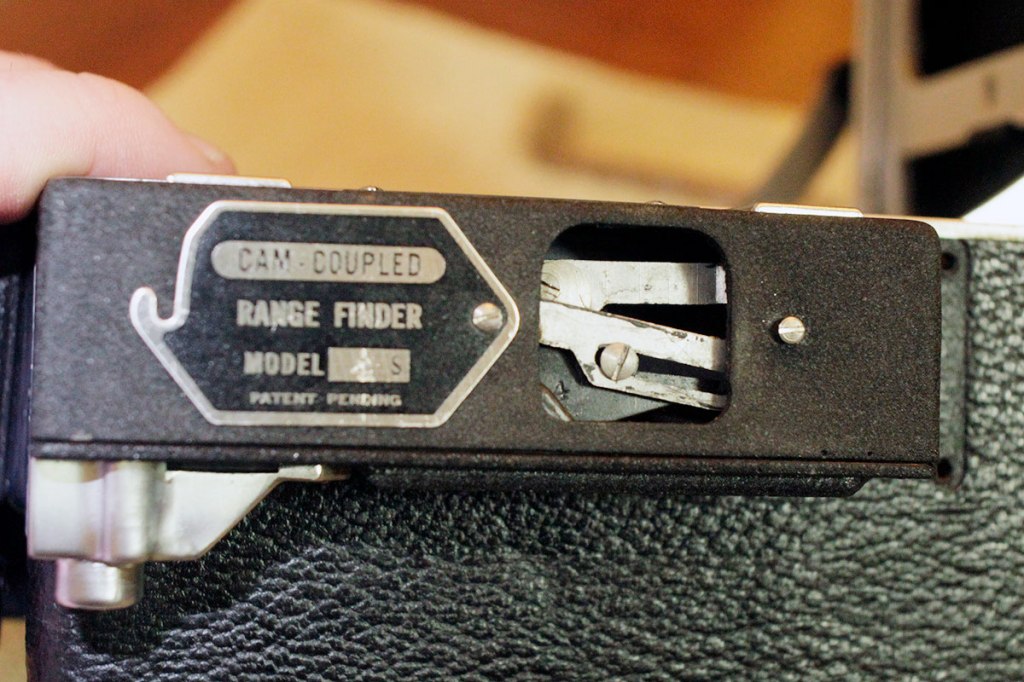
The cam-operated rangefinder can be adjusted easily. However, my camera is missing the periscope eyepiece that allows you to use it. I doubt I’ll miss it in use, and just use the ground glass for precise focusing. 
However, I did put the mechanism back together so it would look complete. 
The rear pop-up viewing hood removed from the back. 
The leather fold-out hood was in terrible shape. It nearly fell apart in my hands. I’ll have to figure out a way to replace it. 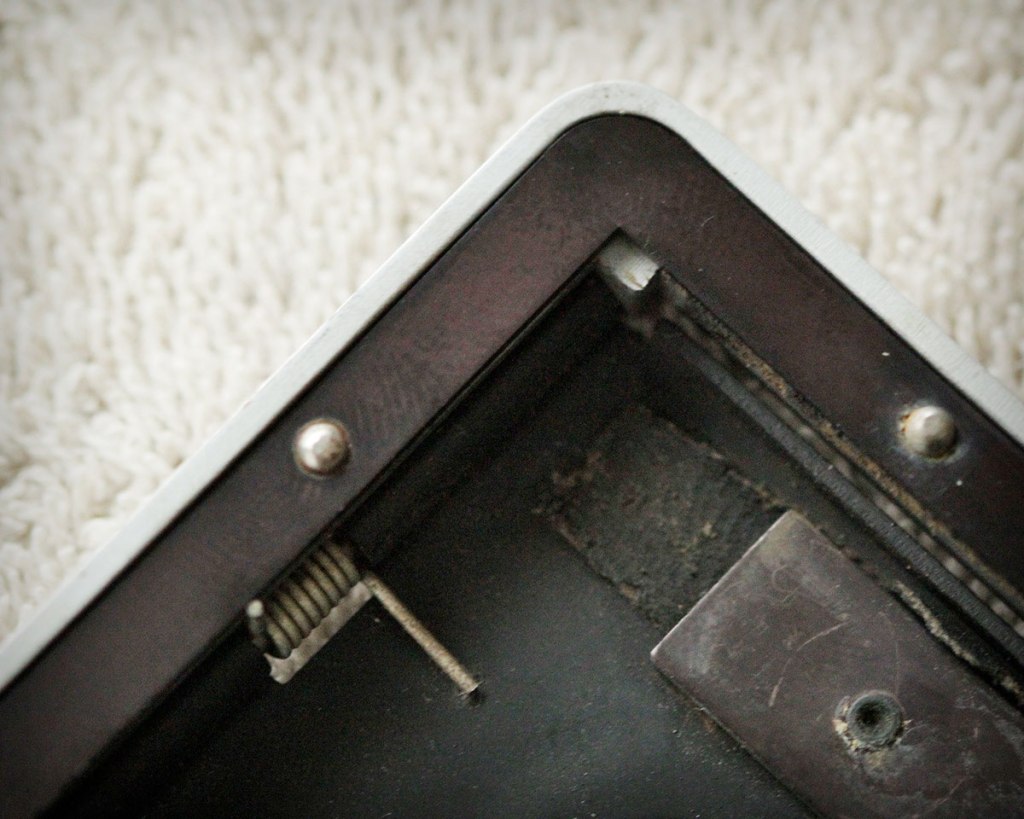
The leather is held in place by this retainer, which in turn is held in place by tiny rivets. This will prove a challenge to remove and reassemble. 
So, I pried it off very gently with a large screwdriver, keeping my hand over the area to catch the rivets as they popped out. Didn’t keep me from losing one down the air vent, though! 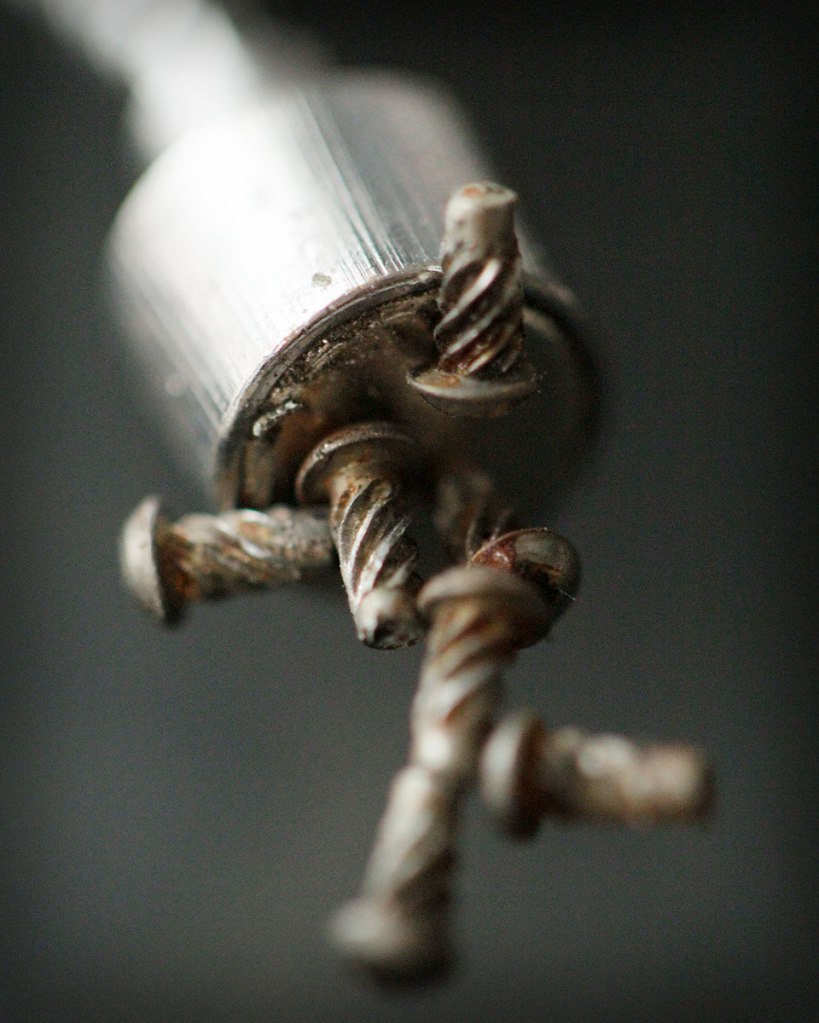
Here are the tiny rivets. And since I haven’t mentioned it before – I always work on cameras and lenses on a light-colored bath towel. It usually keeps tiny screws and springs from bouncing off on to the floor where they’ll never be found. 
There was enough of the original leather hood to make a complete template for a replacement. 
A trip to a local flea market provided me the replacement “pleather”. I used the cover of a CD travel case. 
Not overly easy to attach the material in the correct position with the rivets. Got to use my old ball-peen hammer. Don’t get to do that every day. 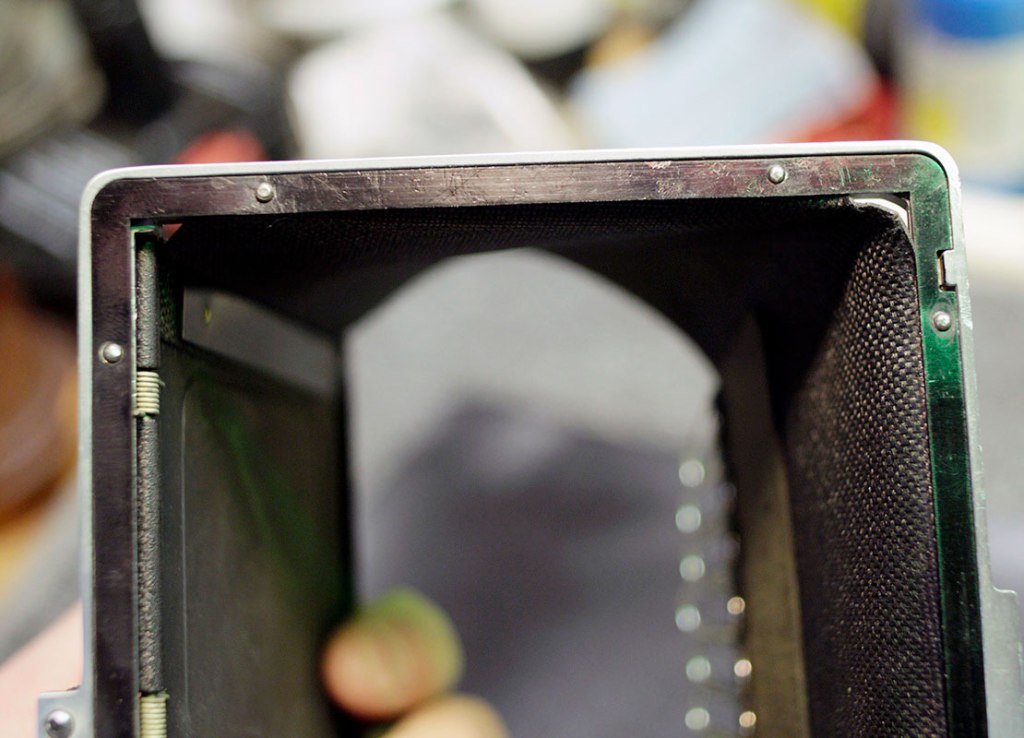
Not a perfect job, but a decent one. It could fit better in the corners, but after struggling to get this back together, I wasn’t motivated to cut another piece. This part will only be for looks anyway. 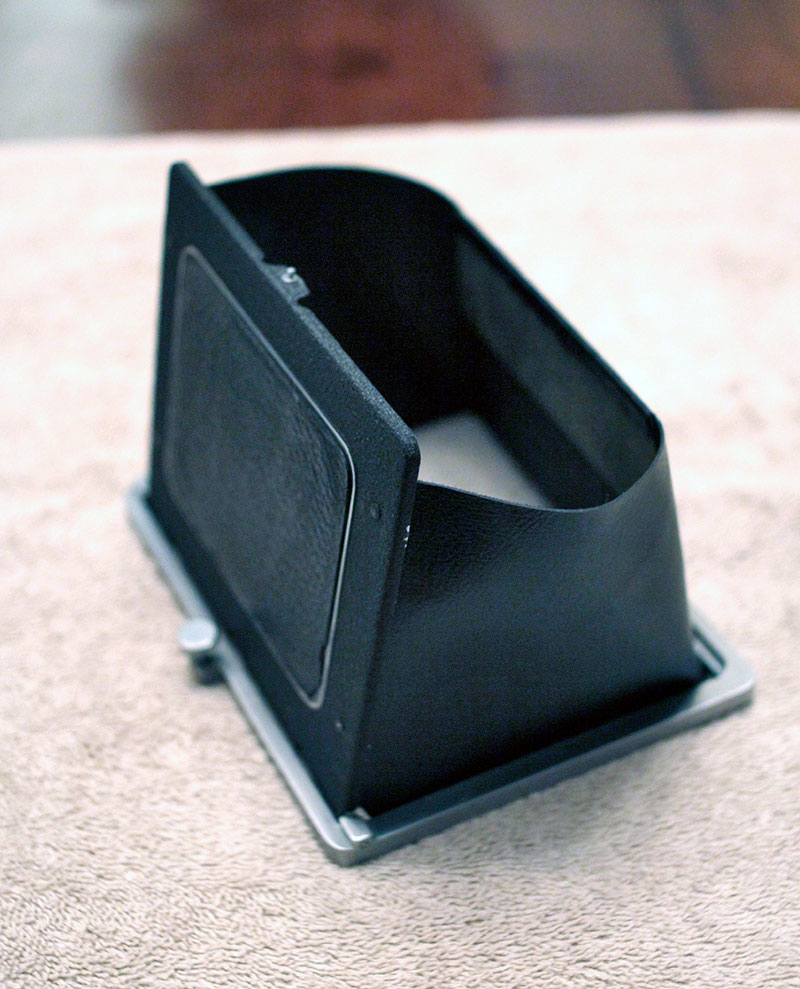
Reassembled and ready to re-attached. 
Cleaned and re-attached the ground glass. One thing the Graflex cameras have over the Pressman is that they usually include a fresnel screen with the ground glass. This makes it a lot easier to compose the image when shooting. Without it, the corners can get very dark. 
Unfortunately, the original Wollensak lens’ shutter was completely locked up. So I found another on Ebay for about $50 USD. 
The “new” lens arrived with a working shutter, but a front element that looked like it had been cleaned with sand paper. 
Luckily, it was the same lens (different shutter). So I was able to use the front element of the original lens to replace the scratched up one. 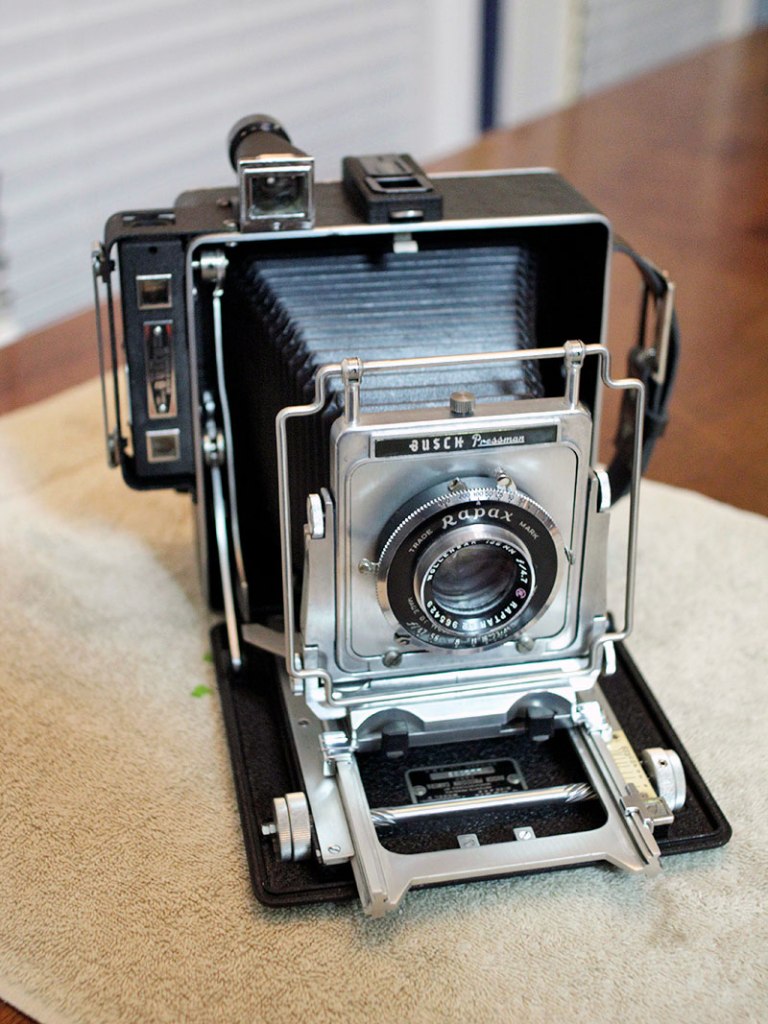
Put together and ready to shoot. 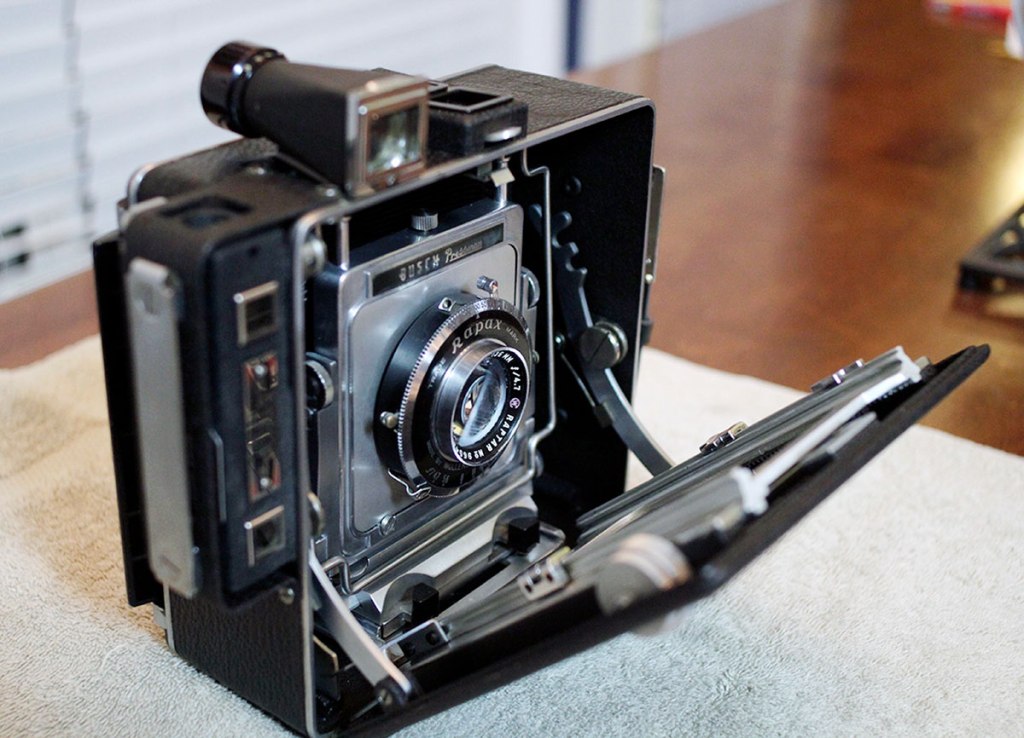
Everything folds up into the body nicely. 

From the ground glass point of view.
All text and photographs on this website (other than found-photography and otherwise noted) are © 2014-2021 Steven Broome. All rights reserved.

Hi:
Any views of how the bellows attached at the back?
I have a C which is missing the rear bellows ‘frame’. Looks like C differs from D in the former has no rotating back. So there may be little similarity…but if I don’t ask, I won’t know.
Thanks
LikeLike
Hi Murray –
Thanks for the question. Let me dig back in the archives and see if I can find something. Will let you know shortly.
LikeLike